Motorhome Warranty Claim: A Step-by-Step Filing Guide

Six actions determine whether your motorhome warranty claim gets approved or denied: check your coverage, gather your documents, call the claims line, schedule diagnosis at an approved facility, get preauthorization before any wrench touches the vehicle, and submit a complete final invoice. Skip the preauthorization step and you can lose the entire claim, even for a legitimate defect. That single mistake, starting repairs before getting an authorization number causes more denials than any mechanical issue ever will.
Here is the checklist to work through today, before you schedule anything:
- Pull your warranty booklet and confirm what is covered, what is excluded, and your deductible amount.
- Locate your VIN or chassis serial number, proof of purchase, and any prior repair orders.
- Call the warranty claims line listed in your contract, not a general customer service number.
- Book diagnosis at a facility your warranty actually recognizes, and confirm that before you drive there.
- Get a written authorization number before any repair work begins.
- Ask whether the shop bills the warranty company directly or whether you pay and get reimbursed.
Pro Tip: Photograph the defect and your odometer the day you first notice a problem, and write down the date. Many warranty contracts require notice within a set window after discovery, and a dated photo is the cheapest insurance policy you will ever own against a later dispute over “when did you know?”
Table of Contents
- Step 1: How to Read Your Warranty and What Documents to Gather
- Step 2: Choosing Between a Dealer, Independent Shop, or Mobile Mechanic
- Step 3: What the Diagnosis Must Include Before You Move Forward
- Step 4: How Preauthorization Works and How to Get the Authorization Number
- Step 5: Submitting the Final Invoice and What Happens With Payment
- What to Do if Your Warranty Claim Gets Denied
- Practical Tips and Common Pitfalls to Avoid
- Get Help Escalating a Denied Motorhome Warranty Claim
- Sources
Step 1: How to Read Your Warranty and What Documents to Gather
Start by opening your warranty booklet to the declaration page and locating five things: what is covered, what is excluded, your deductible, the claims phone number, and your contract number. Most owners never read past the first page until something breaks, and that is exactly when the fine print starts to matter.
Motorhome warranties are rarely one document. You likely have separate coverage for the chassis (often from Ford, Freightliner, or Mercedes-Benz), the coach or habitation systems, and individual components like the generator, slide mechanism, or appliances. Each may carry different terms, different mileage caps, and a different phone number to call. Confusing them is one of the most common reasons claims get delayed.
Before you call anyone, gather these documents:
- Proof of purchase or the original sales contract
- The warranty booklet or service guide for your specific unit
- Warranty registration confirmation, from you or your dealer
- VIN and chassis serial numbers
- Any prior repair orders tied to the same or a related system
- Photos or videos of the defect
Watch for three contract traps that trip up otherwise careful owners. First, registration deadlines: many manufacturer guides require registration within 10 to 30 days of delivery. Second, network restrictions that limit you to authorized dealers for certain repairs. Third, the split between chassis, coach, and component coverage, which determines who you actually call first.
| Document | What It Proves |
|---|---|
| Proof of purchase | Purchase date and original owner |
| Warranty registration confirmation | Coverage start date and active status |
| Repair order | Repair dates, odometer reading, and technician findings |
| VIN or chassis serial number | Vehicle identity across separate chassis and coach warranties |
| Photos or videos | Condition and timing of the defect |
Pro Tip: Serial numbers usually appear on a metal plate near the driver’s door frame for the chassis, and inside a cabinet or utility bay for the coach. If you are not sure whether your dealer completed registration, call the manufacturer directly. Dealers are generally responsible for completing registration shortly after delivery, but that step gets missed more often than you would expect.
Step 2: Choosing Between a Dealer, Independent Shop, or Mobile Mechanic
Pick the repair facility your warranty actually allows, then call ahead to confirm billing and claim procedures before you show up. Not every shop that can fix your RV is a shop your warranty will pay for.
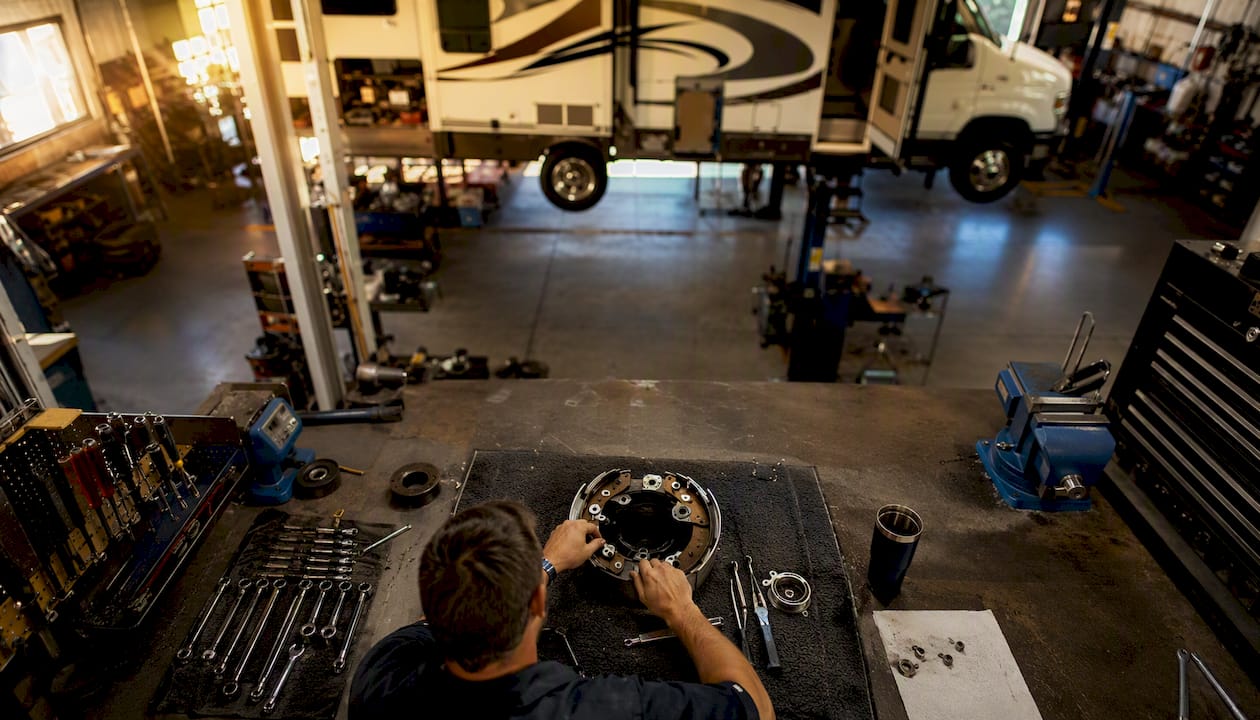
Some warranties require an authorized dealer, especially for chassis work covered by the vehicle manufacturer. Others permit any licensed independent shop as long as it submits a proper itemized invoice. A handful allow mobile mechanics for certain habitation repairs, though this is less common and worth confirming in writing before you commit.
Weigh these factors when deciding where to go:
- Whether your contract lists network restrictions or requires authorized-dealer service
- Distance and appointment wait times, which for RV shops can run several weeks
- Whether the shop has experience with motorhome-specific systems, not just automotive repair
- Licensing and a valid tax ID, since warranty companies typically will not reimburse unlicensed work
Before booking, ask the shop these questions directly:
- Have you handled warranty claims for this brand or component before?
- Will you bill the warranty company directly, or do I pay and submit for reimbursement?
- Can you produce a fully itemized diagnostic invoice, not just a repair estimate?
- What is your process for returning defective parts if the warranty company requires them back?
- Will you call the warranty provider yourself to request preauthorization?
Dealer-run service departments tend to have established relationships with manufacturers and know the preauthorization process cold. Independent shops can be faster and cheaper, but you carry more responsibility for making sure the paperwork meets the warranty company’s standard. Mobile mechanics work fine for minor habitation issues, but almost never for chassis or engine coverage.
Pro Tip: Confirm the shop will call for preauthorization before they touch the vehicle, not after. A shop that says “we’ll just fix it and sort out billing later” is setting you up for a fight you don’t need to have.
Step 3: What the Diagnosis Must Include Before You Move Forward
Insist on a fully itemized diagnostic invoice that explains the cause, the parts needed, and labor estimates, before any repair work starts. This single document is what separates a smooth claim from a denied one.
Claims adjusters are not in the room when your generator dies or your slide-out jams. They are working entirely from paper, and a vague invoice that says “generator repair, $800” gives them nothing to approve. A proper diagnostic writeup needs to show:
- The symptom as originally reported by the owner
- The technician’s specific findings after inspection
- The recommended repair, described by part and procedure, not just “fix issue”
- Estimated parts and labor costs, broken out separately
- Line-item pricing for every part and every hour of labor
A sample line-item list a claims team expects to see might look like this:
- Diagnostic labor, one hour
- Replacement control board, part number listed
- Installation labor, estimated at two hours
- Sealant or gasket materials, if applicable
- Freight or shipping charge for the part, if the shop does not stock it
When the shop calls the warranty provider, a simple script works well: “I have [owner name] here with a [year, make, model] motorhome under warranty contract number [X]. The reported issue is [symptom]. Our diagnosis shows [finding], and we’re requesting authorization to proceed with [repair], estimated at [cost].” That structure gives the adjuster everything needed to approve or ask follow-up questions in one call.
Starting repairs before authorization is one of the most common reasons claims get denied outright, regardless of how legitimate the underlying defect is. Manufacturer guides are explicit that owners should call before any work is performed and secure an authorization number first.
Step 4: How Preauthorization Works and How to Get the Authorization Number
Do not let anyone start repairs until you have a warranty-issued authorization number tied to your specific claim. This is the checkpoint that protects both your coverage and your wallet.
The flow generally runs the same way across most manufacturers. The shop calls the warranty provider with the diagnostic invoice in hand. The warranty company opens a claim file and assigns it a claim number. An adjuster reviews the scope of work against your contract’s coverage terms. If approved, the adjuster issues an authorization number along with instructions, which sometimes include a requirement to return the old, defective part for inspection.
Common conditions attached to authorization include:
- A requirement to return the original failed part, often at the shop’s expense until reimbursed
- A mandate that certain repairs, especially chassis or drivetrain, go through a manufacturer-designated dealer
- A cap on labor hours or parts cost that may require a follow-up call if the repair runs longer than estimated
- A time window in which the authorized repair must be completed before the authorization expires
Pro Tip: Write down the authorization number, the adjuster’s name, and the date and time of the call the moment you get off the phone. If a dispute arises later, “we talked to someone” is worthless. “We spoke with Adjuster Martinez at 2:15 PM on March 4 and received authorization number 48291” is the kind of detail that ends an argument before it starts.
Once the shop has the authorization number, they should confirm the scope matches what was approved, keep the original part for return if required, complete the repair within the authorized window, and note the authorization number on the final invoice. Skipping that last step is a common, avoidable delay at the reimbursement stage.
Step 5: Submitting the Final Invoice and What Happens With Payment
Submit an itemized final invoice that includes your claim number, authorization number, VIN, and the completed repair order. From there, the warranty company usually pays the shop directly or reimburses you minus your deductible.
Your final submission packet should include:
- The itemized final invoice showing actual work performed and actual costs
- The authorization number issued before repairs began
- Photos of the completed repair, if requested
- Proof of payment, if you paid upfront and are seeking reimbursement
- Return shipping or drop-off confirmation for any part the warranty company required back
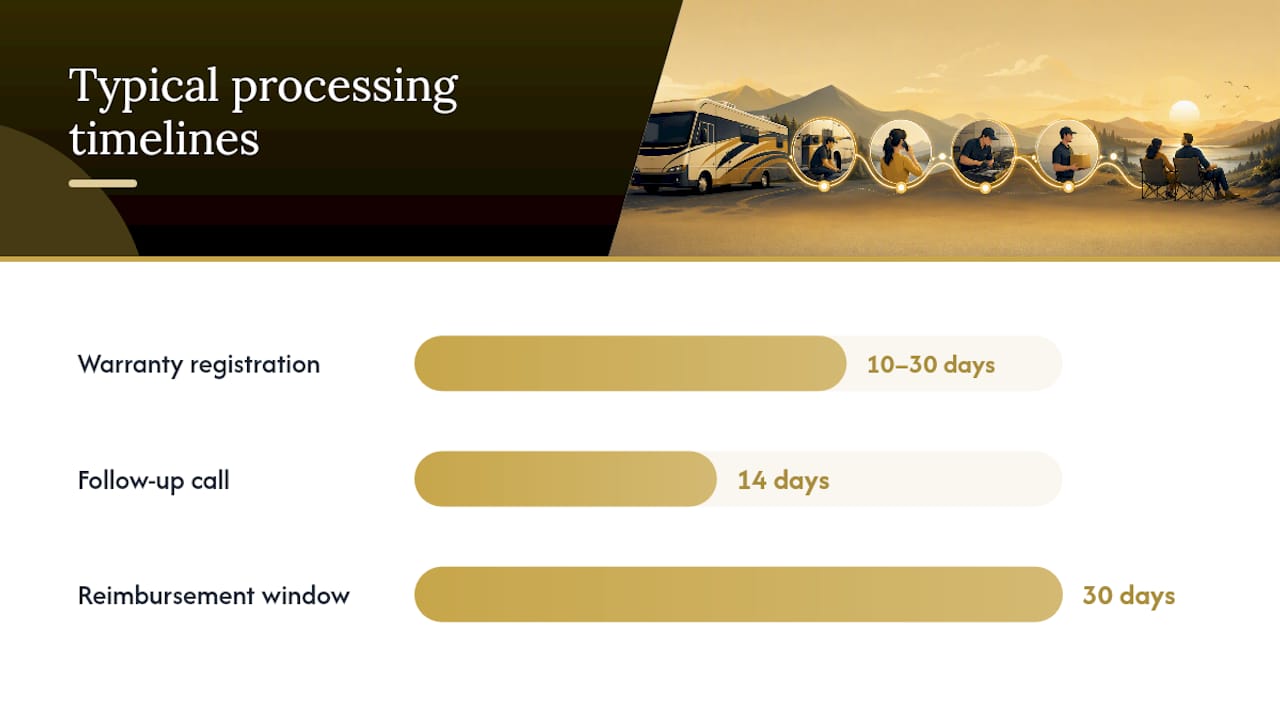
Processing timelines vary by manufacturer and by how complete your paperwork is on the first submission. A practical six-step workflow that covers checking coverage, finding a facility, diagnosis, preauthorization, repair, and final invoice submission reflects what most RV owners actually experience, and delays almost always trace back to a missing document rather than a slow adjuster.
| Milestone | Typical Timeline |
|---|---|
| Warranty registration after delivery | 10 to 30 days, per manufacturer guide |
| Notice of defect to dealer or manufacturer | As soon as discovered, ideally within days |
| Preauthorization decision after diagnostic call | Often same day to a few business days |
| Reimbursement paperwork submission window | Commonly 30 days, per manufacturer guide |
Who pays upfront depends entirely on your contract and the shop’s own policy. Some shops will bill the warranty company directly and only collect your deductible at pickup. Others require you to pay the full invoice and submit for reimbursement yourself, which means you are financing the repair until the check arrives. Ask this question before you book the appointment, not after the work is done.
If two weeks pass with no word after submitting your final invoice, call the claims line and ask for a status update by claim number. Keep a simple log of every call, including the date and the name of whoever you spoke with. That log becomes critical if the claim stalls or gets disputed later.
What to Do if Your Warranty Claim Gets Denied
If your claim is denied, get the denial in writing first, then work through a fixed sequence: gather your complete repair history, file a manufacturer appeal, use outside dispute channels, and consult an attorney if those options run out. Do not accept a verbal denial over the phone as the final word.
Work through this escalation checklist in order:
- Request the denial reason in writing, referencing your specific claim number
- Compile every repair order, invoice, and communication log tied to the issue
- File a formal written appeal with the manufacturer, attaching your documentation
- File a complaint with the Better Business Bureau if the manufacturer appeal stalls or is denied again
- Contact your state’s consumer protection agency if the manufacturer is unresponsive
- Consult a lemon law attorney if the vehicle has a pattern of unresolved defects
For California motorhome owners, the legal picture gets more complicated than a typical car claim. Motorhomes often have separate chassis and habitation manufacturers, which means a defect in the chassis (built by Ford or Freightliner, for example) may fall under different legal responsibility than a defect in the coach built by the RV manufacturer. The Song-Beverly Act still applies, but proving which manufacturer bears responsibility, and documenting repair attempts against each one separately, is where these claims frequently get complicated. Learn how to escalate a known RV defect if your case involves overlapping manufacturers.
Non-litigation options exist before you ever need a lawyer. Manufacturer appeals, BBB complaints, and state attorney general consumer divisions all resolve a meaningful share of disputes without a courtroom. Small claims court is also an option for lower-dollar disputes. The Magnuson Moss Warranty Act sets federal disclosure standards for written warranties and gives consumers additional remedies when a manufacturer breaches its own written terms.
When a motorhome has racked up multiple repair attempts across several trips to the shop, and the paperwork shows the manufacturer had every opportunity to fix it and didn’t, that pattern of documented failure is often the strongest evidence in a lemon law claim. The owners who struggle most are the ones who never wrote anything down.
This section is educational information about the general claims and escalation process. It is not individualized legal advice for your specific situation, and you should confirm current requirements with the manufacturer, a consumer protection agency, or a qualified attorney.
Practical Tips and Common Pitfalls to Avoid
Do these five things and you will avoid the vast majority of delays and denials: register your warranty quickly, call ahead before booking repairs, insist on itemized diagnostics, document every contact, and keep your paperwork organized from day one.
The highest-impact habits, in order of how often they prevent problems:
- Register your warranty within the manufacturer’s stated window, not “sometime this month”
- Call the claims line before scheduling any repair, every single time
- Refuse a vague repair estimate and insist on an itemized diagnostic invoice
- Log every phone call with date, time, and the name of the person you spoke with
- Store photos, repair orders, and your warranty booklet in one folder, physical or digital
Pro Tip: Adjusters reviewing a claim from the manufacturer’s side are trained to look for gaps: missing dates, vague repair descriptions, and any sign that work started before authorization. An owner whose paperwork closes every one of those gaps is far harder to deny.
Before you pick up the phone to call the warranty provider, run through this quick checklist:
- Do I have my contract number and VIN in front of me?
- Do I know exactly what symptom I am reporting, in plain terms?
- Have I confirmed the repair facility is one my warranty actually recognizes?
- Am I prepared to ask for a written authorization number before agreeing to any repair?
Author perspective: what an experienced RV lemon law attorney sees most often
The claims that fail almost always fail for the same three reasons: missing warranty registration, informal repair notes that never spell out the actual defect, and repairs that started before anyone got an authorization number. None of these are complicated legal problems. They are paperwork problems, and paperwork problems are entirely preventable.
Having spent 11 years on the other side, defending manufacturers against exactly these claims, I can tell you what that side is trained to do: look for the gap. A repair order that says “customer complains of noise” instead of “slide motor grinding on extension, confirmed by technician” gives a manufacturer’s defense team room to argue the defect was never properly documented or that it might be unrelated to the warranty claim you are making now. Owners who counter that strategy do it with specifics: dates, odometer readings, technician names, and authorization numbers written down the moment they receive them. That level of documentation does not guarantee a result, but it removes the easiest arguments a manufacturer’s team can make.
This section reflects general patterns observed in warranty and lemon law disputes. It is educational information, not individualized legal advice for your situation. If your motorhome has a documented pattern of unresolved defects, our RV lemon law practice page explains what a case review typically covers.
Get Help Escalating a Denied Motorhome Warranty Claim
If your warranty claim was denied and you have already gone through the manufacturer’s appeal process, request a free case review and bring your repair orders, VIN, warranty documents, and photos. Unlike a high-volume lemon law operation where you talk to a case manager, you speak directly with the attorney handling your file, and that attorney spent 11 years defending manufacturers before switching sides, so he knows exactly what their defense strategy will look like before they build it.

For a case review, have ready: your complete repair history, the make, model, and year of your motorhome, your VIN, your warranty contract number, copies of every denial letter, and photos or video of the defect. Every case runs on contingency, meaning it costs you nothing to have your file reviewed, and if the firm takes your case, payment comes from the manufacturer or dealer if you win or settle, not out of your pocket. Recovery can include a full repurchase, a replacement vehicle, or a cash settlement, and under California’s Song-Beverly Act, a manufacturer that willfully ignored its warranty obligations can owe a civil penalty of up to two times your actual damages.
The firm focuses on California matters, given the state-specific nuances around chassis and habitation coverage described earlier in this guide. Out-of-state owners are welcome to reach out for general escalation guidance, though representation is limited to California claims. One more thing worth knowing: California’s AB 1755 shortened the filing deadline, so if your warranty has already expired, you generally have one year from that expiration date to file. Waiting costs you options. Request your free case review today and find out where you stand.
Short recap: the few things to remember before you act
The single most important rule in any motorhome warranty claim is this: document everything, register on time, and never authorize repairs to begin without a written authorization number in hand.
- Register your warranty within the manufacturer’s stated window, and confirm your dealer actually did it
- Get an itemized diagnostic invoice before agreeing to any repair
- Never let a shop start work without a documented authorization number
- Log every call: date, time, adjuster name, and what was approved
- If denied, appeal in writing, escalate through BBB or your state agency, then consider a lemon law attorney
Sources
These sources back the process steps and timelines described throughout this guide, and they are worth saving as you assemble your own claim packet.
- GDRV_MOTORIZED_Warranty_Service_Guide_Rev.05.2026_v2_.pdf
- 644-2025-Jayco-Motorized-Warranty-Guide—WEB-REDUCED.pdf
- How to File an RV Warranty Claim — Escapees
This article is general information, not a substitute for advice from a qualified lawyer. Consult a qualified legal professional about your own circumstances before acting on anything here.